The beginner’s guide to installing a hard drive.
Installing a hard drive is very simple, even if you don’t have much experience with the inner workings of your computer. We will walk you through the basics of the installation but before we begin, it’s important that you make sure you have the right drive for your computer.
Hard Drive Options
Most modern computers use SATA (SerialATA) hard drives. This is the most commonly used interface and are faster than older drives. IDE (Integrated Drive Electronics) are more often used in older computers. If you store a lot of photos, edit video, or are a big gamer, a SATA hard drive is the way to go for dramatically improved computer performance. Many professionals and enthusiasts prefer the SSD (Solid State Drive) because it’s extremely fast, has no moving parts and is very durable.
RAID (Redundant Array of Independent Disks) is another option for anyone who needs serious storage. There are a few different options when it comes to RAID. RAID 0 will provide blistering fast performance, but with decreased reliability. RAID 1 provides increased reliability and extra backup for your data, but it doesn’t offer any additional speed.
If you’re not sure what hard drive capacity is best for you, a 1 TB drive is enough space for most people. If you feel like you could do with less storage space, a 400 GB hard drive is a great compromise of speed and performance.
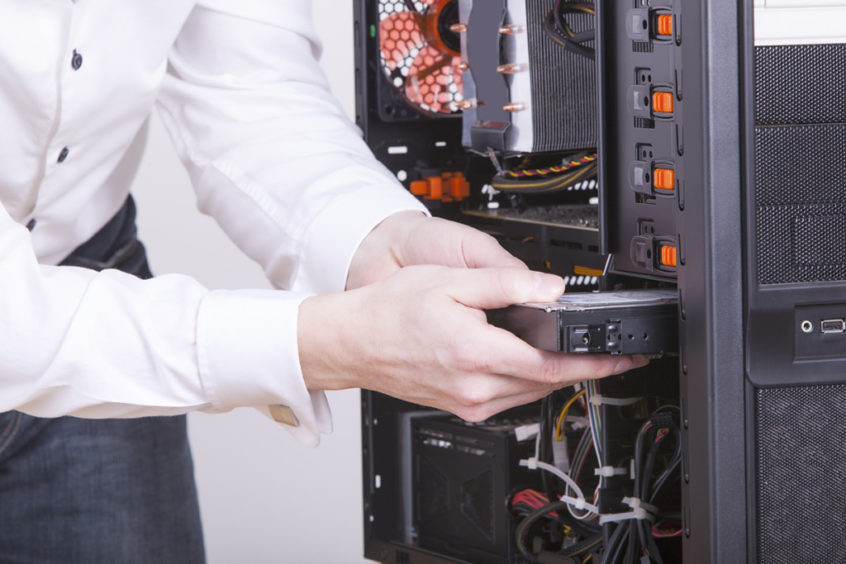
Installing Your New Hard Drive
Once you have determined what you need, you’re ready to begin the installation. Most hard drives have small screw holes on the sides which are used to secure your drive inside the case. Take note of those. Next, look inside your case and locate the caddy that will hold your hard drive. Once you locate the caddy, simply slide your hard drive into it and watch as the holes in the caddy align with the screw holes on your drive. Use a screwdriver to fasten a screw into each exposed hole. Some people just secure the drive in place with one or two screws, but you can secure all four if you choose. Once you have successfully secured it in the case, you’re ready to hook it up.
To hook up your drive you’ll need two things: a SATA cable and the SATA power plug. The SATA cable connects your hard drive to the motherboard, and the SATA power plug powers the drive itself. The SATA power cable will already be connected to the power supply within your computer, so you’ll just need to plug the other end of the SATA power into your hard drive. The SATA power connects with the larger of the two tabs located on your drive.
Now that you have your SATA power connected, plug your SATA cable into the second power tab slot (to the right of the one you just connected) on your hard drive. The opposite end of your SATA cable connects to the SATA header on your motherboard. Most computers have several SATA header slots and you can plug your SATA cable into any one of them. Just make sure it is firmly and securely connected.
Once you have connected both your SATA power and SATA cable, you have successfully installed your new hard drive!
If your computer doesn’t have a place to mount SSD drives, a 2.5-inch – 3.5 inch SATA adaptor
will enable you to install a 2.5-inch SATA/SAS drive into a 3.5-inch drive bay. This is a versatile and very affordable way to get your SSD drives into your computer even if you don’t have a place to mount them.
For a visual demo on installing a hard drive, consult the video below. Otherwise, good luck!